A leaking roof can start as a minor problem but quickly escalate into serious damage that affects your entire home’s structure and comfort.
Small leaks often show subtle signs like water stains, damp smells, or mould growth, which, if ignored, can lead to costly repairs including damaged ceilings, rotting timber, and even weakened foundations.
Understanding the common causes of leaks—from damaged shingles and faulty flashing to clogged gutters and poor ventilation—helps you tackle problems early.
This article guides you through recognising these issues and provides practical steps for effective repair. For additional advice and resources, have a peek here.
How to Spot Roof Leaks Early
Early detection of roof leaks is the best way to prevent costly repairs. Not all leaks are obvious; sometimes the signs are subtle and require close attention.
Common Signs of Roof Leaks
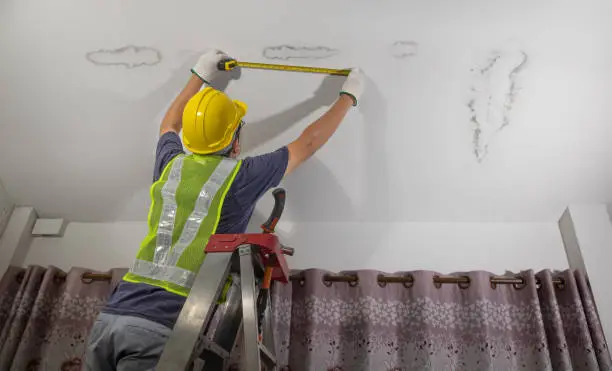
- Water stains on ceilings and walls: These often appear as yellowish or brownish patches. Sometimes the edges are darker where water pools before drying.
- Dripping sounds during rain: If you hear water dripping or trickling when it rains, it’s likely your roof is letting water through.
- Mould or mildew growth: Damp areas inside the house often develop mould, which appears as black, green, or grey spots. This is a health risk as well as a sign of water damage.
- Damaged or missing shingles: Inspect your roof from the ground or a safe vantage point. Shingles that are cracked, curled at the edges, or missing altogether leave gaps for water.
- Musty odour: Persistent damp smells inside rooms or roof spaces can indicate moisture trapped behind walls or ceilings.
- Loose flashing or sealant: The metal strips around chimneys, vents, and skylights can pull away or crack over time, creating leak points.
Checking Attics and Roof Spaces
Often, the source of a leak is more visible inside the roof space or attic.
- Look for dark patches on timber beams or wet insulation.
- Feel wood surfaces for dampness or softness, which indicates decay.
- Use a flashlight to spot daylight coming through gaps in the roof.
- Any sagging or warping of beams can suggest water damage.
Regular inspections inside the attic can catch leaks before they become major.
Common Causes of Roof Leaks
Knowing what usually causes leaks helps you address the problem correctly.
Damaged or Missing Shingles
Shingles protect your roof from rain, wind, and sun damage.
- Over time, extreme weather like storms or hail can loosen or break shingles.
- Exposure to UV rays causes some materials to become brittle and crack.
- Heavy winds may blow shingles off entirely, exposing the underlay.
- Age also causes natural wear; roofs older than 20 years often need replacement.
Faulty Flashing
Flashing seals vulnerable joints on the roof.
- Flashing around chimneys, vents, or skylights can rust or break.
- Poor installation or natural wear causes flashing to separate from roofing materials.
- Sealant around flashing edges dries and cracks, allowing water ingress.
Clogged or Broken Gutters
Gutters channel water away from your roof and walls.
- Leaves, twigs, and debris clog gutters, causing overflow.
- Overflowing water seeps under roof edges and damages fascia boards.
- Damaged gutters with holes or loose fittings leak directly onto the roof.
Poor Roof Ventilation
- Lack of airflow traps moisture inside roof spaces.
- Condensation forms on rafters and insulation, weakening roofing materials.
- Over time, trapped moisture causes mould and rot, leading to leaks.
How to Fix Common Roof Leaks
Fixing leaks promptly prevents further damage. Many repairs are manageable with some tools and care.
Step 1: Safety First
- Use a sturdy ladder placed on level ground.
- Wear shoes with good grip and gloves.
- Avoid working on the roof in wet or windy weather.
- Consider asking someone to spot you or hire professionals for steep roofs.
Step 2: Replace Damaged or Missing Shingles
- Remove damaged shingles carefully using a flat pry bar.
- Slide replacement shingles into position, matching the existing pattern.
- Nail shingles securely with roofing nails.
- Apply roofing cement around edges and nail heads for extra protection.
Step 3: Repair or Replace Flashing
- Remove damaged flashing carefully.
- Clean the surrounding area to remove old sealant and debris.
- Install new flashing metal strips, ensuring tight fitting around roof features.
- Apply roofing sealant around edges and seams.
Step 4: Clear and Repair Gutters
- Wear gloves and remove debris from gutters using a scoop or gloved hand.
- Flush gutters and downpipes with water to ensure flow.
- Apply gutter sealant to holes or leaks.
- Replace or secure any loose sections.
Step 5: Improve Roof Ventilation
- Clean existing vents to remove blockages.
- Add ridge or soffit vents if airflow is poor.
- Make sure insulation doesn’t block ventilation openings.
- Proper airflow reduces condensation and prolongs roof life.
Tools and Materials Needed for Roof Leak Repairs
Having the right equipment is essential for safe and effective repairs.
Essential Tools
- Extension ladder and stabiliser
- Hammer or roofing nail gun
- Flat pry bar or roofing shovel
- Utility knife or tin snips
- Caulking gun for sealants
- Measuring tape
- Gloves, safety glasses, and non-slip footwear
Materials to Keep Ready
- Replacement shingles matching your roof type and colour
- Roofing nails or screws
- Roofing cement or sealant (weatherproof and UV resistant)
- Metal flashing sheets or preformed pieces
- Gutter sealant and repair patches
When to Call a Professional
Some situations require the expertise and equipment of licensed roofers.
Situations Requiring Expert Help
- Multiple or large leaks spread over the roof
- Roof damage extending to structural timber or decking
- Steep or high roofs posing safety hazards
- Persistent leaks after DIY attempts
- Insurance claims involving storm or hail damage
Professionals provide thorough inspections, guarantee work, and ensure repairs comply with Australian building standards.
How Regular Maintenance Prevents Roof Leaks
Routine care stops leaks before they start.
Maintenance Tasks to Perform
- Inspect your roof at least twice a year and after storms.
- Clean gutters and downpipes to prevent blockages.
- Trim overhanging branches to avoid damage and debris build-up.
- Remove moss, algae, or lichen that trap moisture.
- Check and reseal flashing and sealant annually.
Benefits of Maintenance
- Detect minor issues early, reducing repair costs.
- Keep gutters and drainage systems working efficiently.
- Prevent decay and mould growth.
- Extend your roof’s lifespan significantly.
Conclusion
Identifying and fixing common roof leaks before they get worse protects your home from damage and costly repairs.
By regularly inspecting your roof, addressing causes such as damaged shingles, faulty flashing, and clogged gutters, you can keep your roof in good condition.
When repairs go beyond your skill or safety limits, professional roofers can help ensure a secure, lasting fix. Taking early action and maintaining your roof means your home stays dry and safe through every season.
Frequently Asked Questions
How quickly should I fix a roof leak?
It’s best to fix roof leaks as soon as you notice them. Delaying repair can worsen water damage, lead to mould, rot, and structural weakening. Early fixes save money and stress.
Can I fix roof leaks myself safely?
If the leak is small and your roof is easy to access, DIY repair is possible with proper safety gear. For larger, complex leaks or steep roofs, hiring a professional is safer and more reliable.
How much does roof leak repair usually cost?
The cost depends on the leak’s size, damage extent, and materials. Small repairs might cost a few hundred dollars, while extensive repairs or replacements can run into thousands.